Instructions and images of an adaptor for PolarAlign's augmented reality function which fits
Celestron CGEM and CG-5 mounts. It is made from a 2 inch PVC adaptor, receptacal cover, cable
staples, velcro, 3 wing screws and super glue. You'll need a drill bit and tap to drill and tap the wing screws.
Click on the images for a much larger view.
Instructions:
Assumptions: The assumption is that you know what you are doing and that these instructions are not intended
to teach you how to build an adaptor. The pictures should give you a real good idea and everything should be apparent to the tinkerer.
1) Make template of the back of the iPhone and carefully locate the camera lens.
2) Transcribe the camera lens marking to the recepticle cover and drill the lens hole.
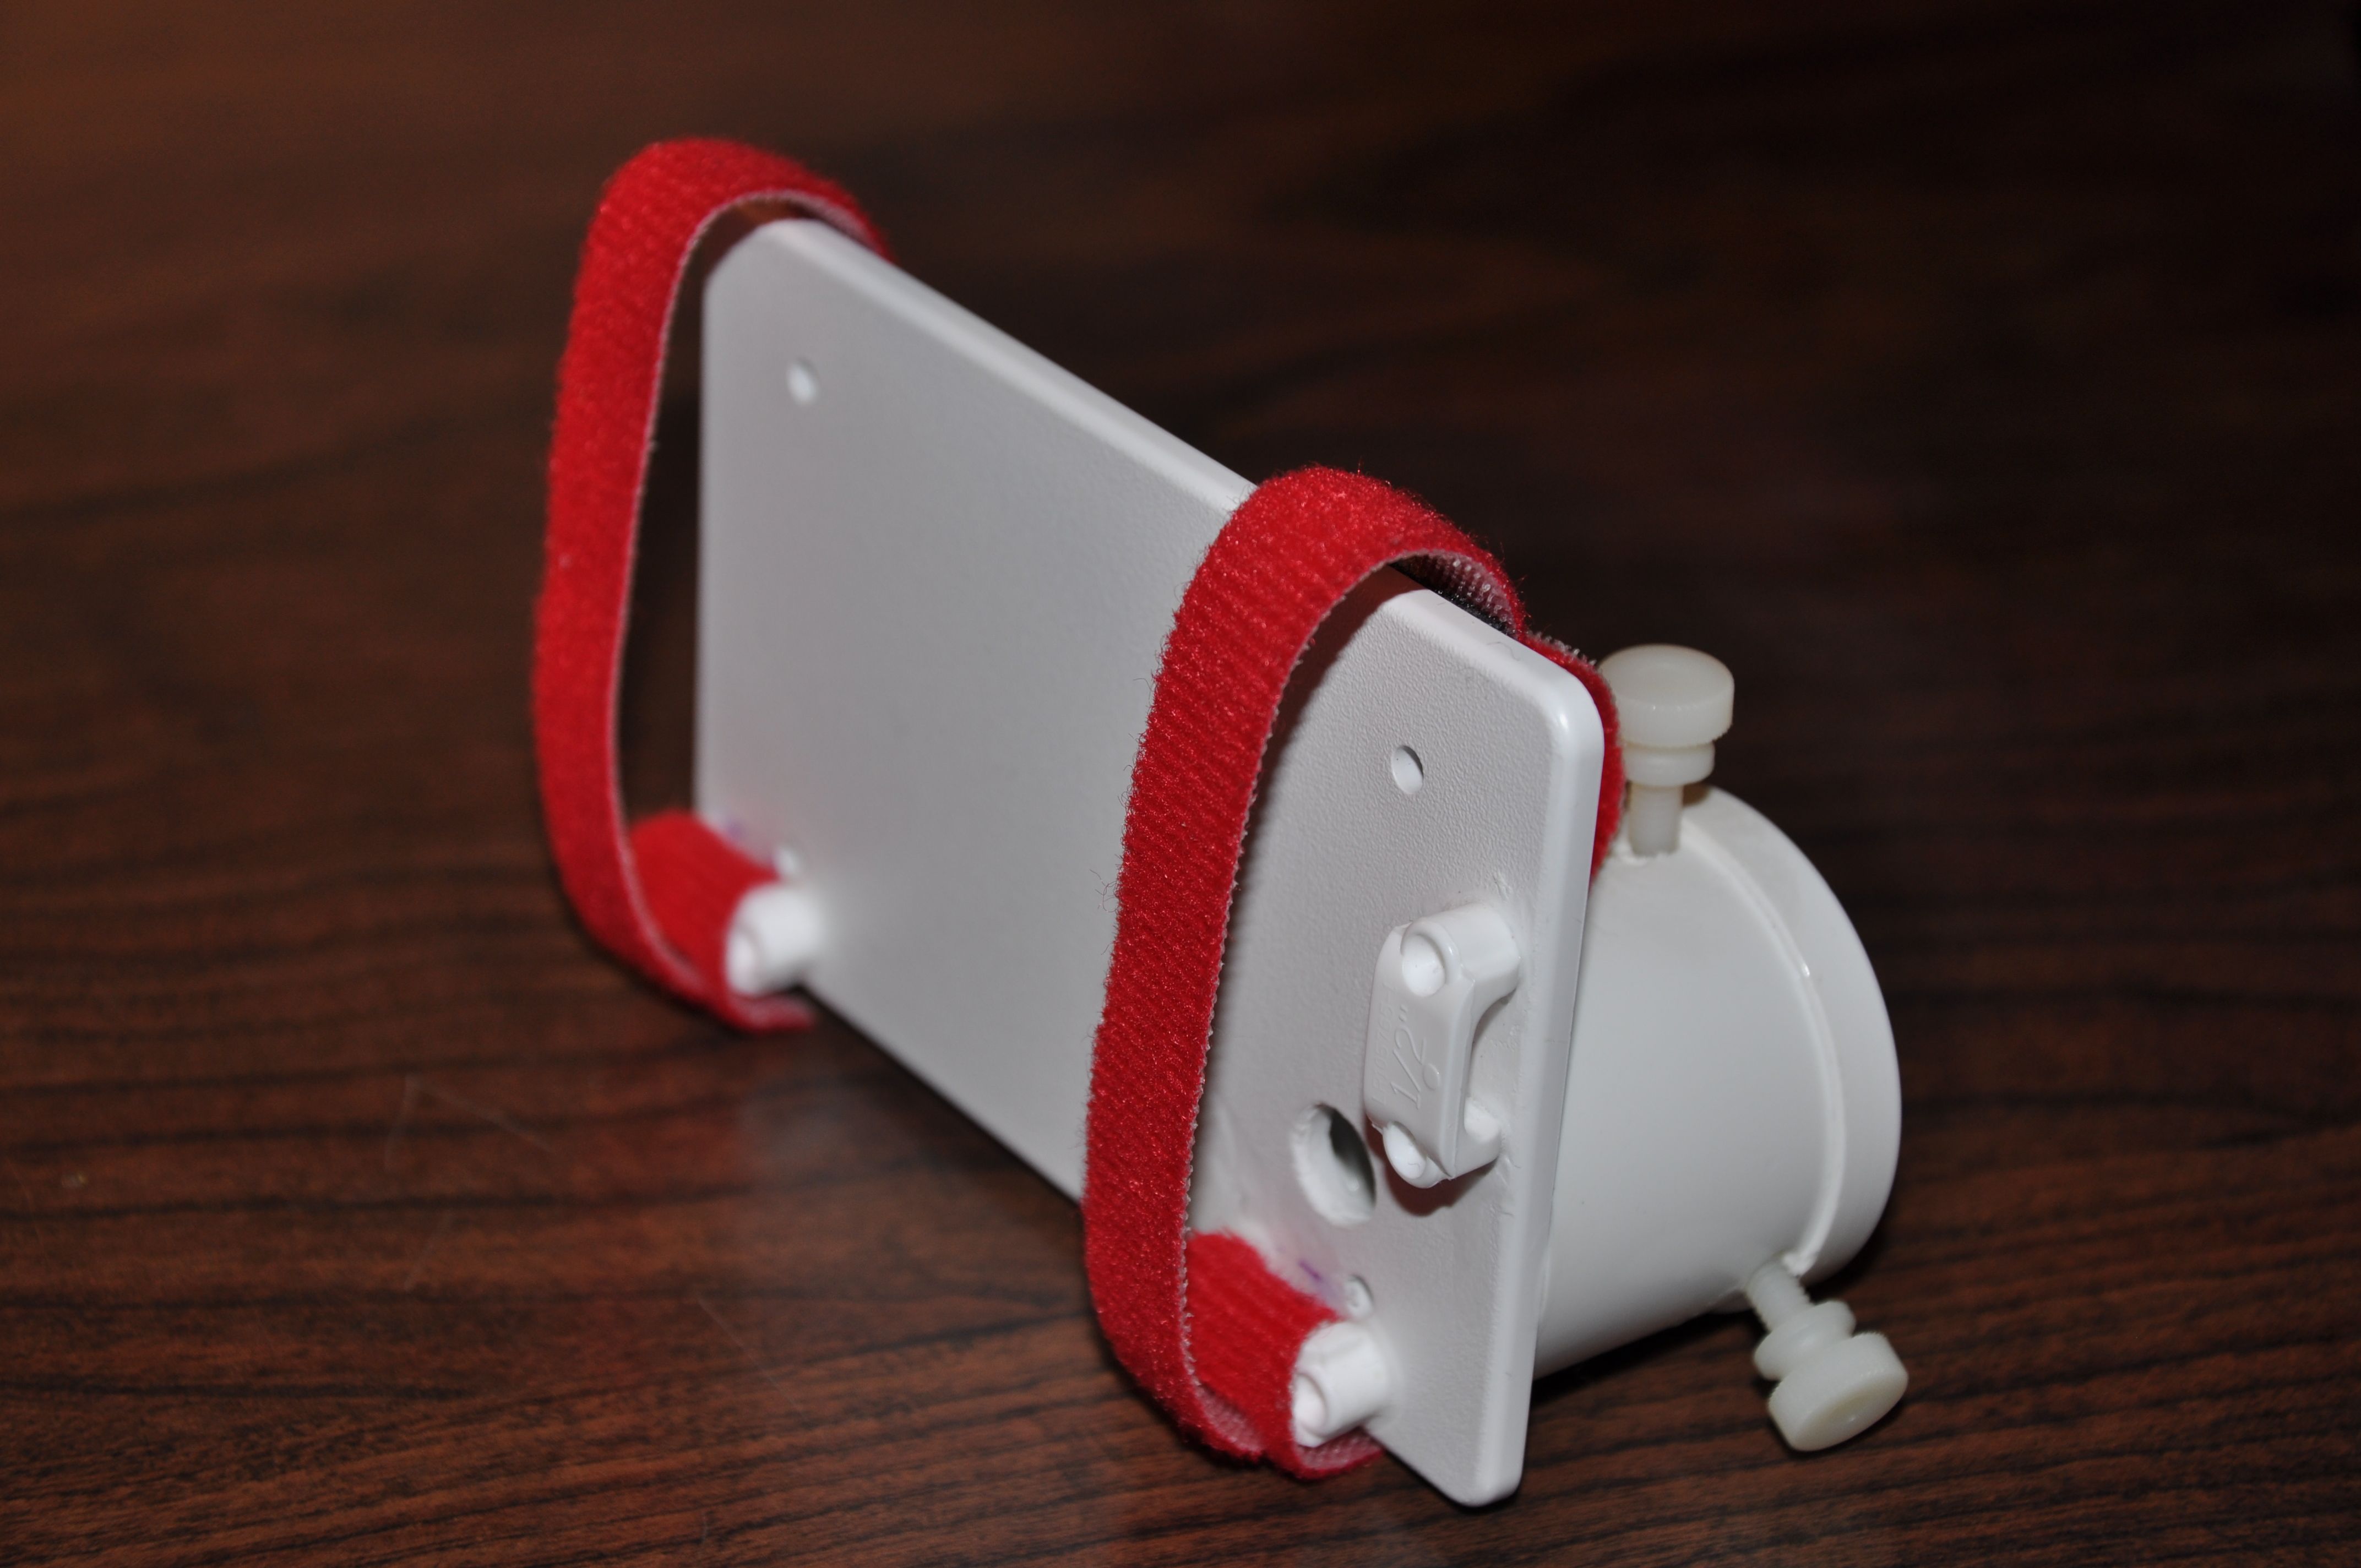
3) Locate where to glue the cable staples and glue them in place; use these pictures for reference!
4) Add the velcro straps.
5) Drill and tap the holes in the PVC adaptor and screw in the screws. The PVC adaptor may have to be cut if it is too long and this I can't offer any
advice on but please be careful.
6) mount the adaptor on the back of the mount. There needs to be just a little clearence (1/8 inch) between the
polar finder eyepiece and edge of PVC adaptor.
7) With iPhone strapped in place and app running, center the recepticle cover on the PVC adaptor and locate the perfect centered
position and use a pencil to mark the adaptor.
8) Remove the camera and super glue the recepticle cover to the PVC adaptor.
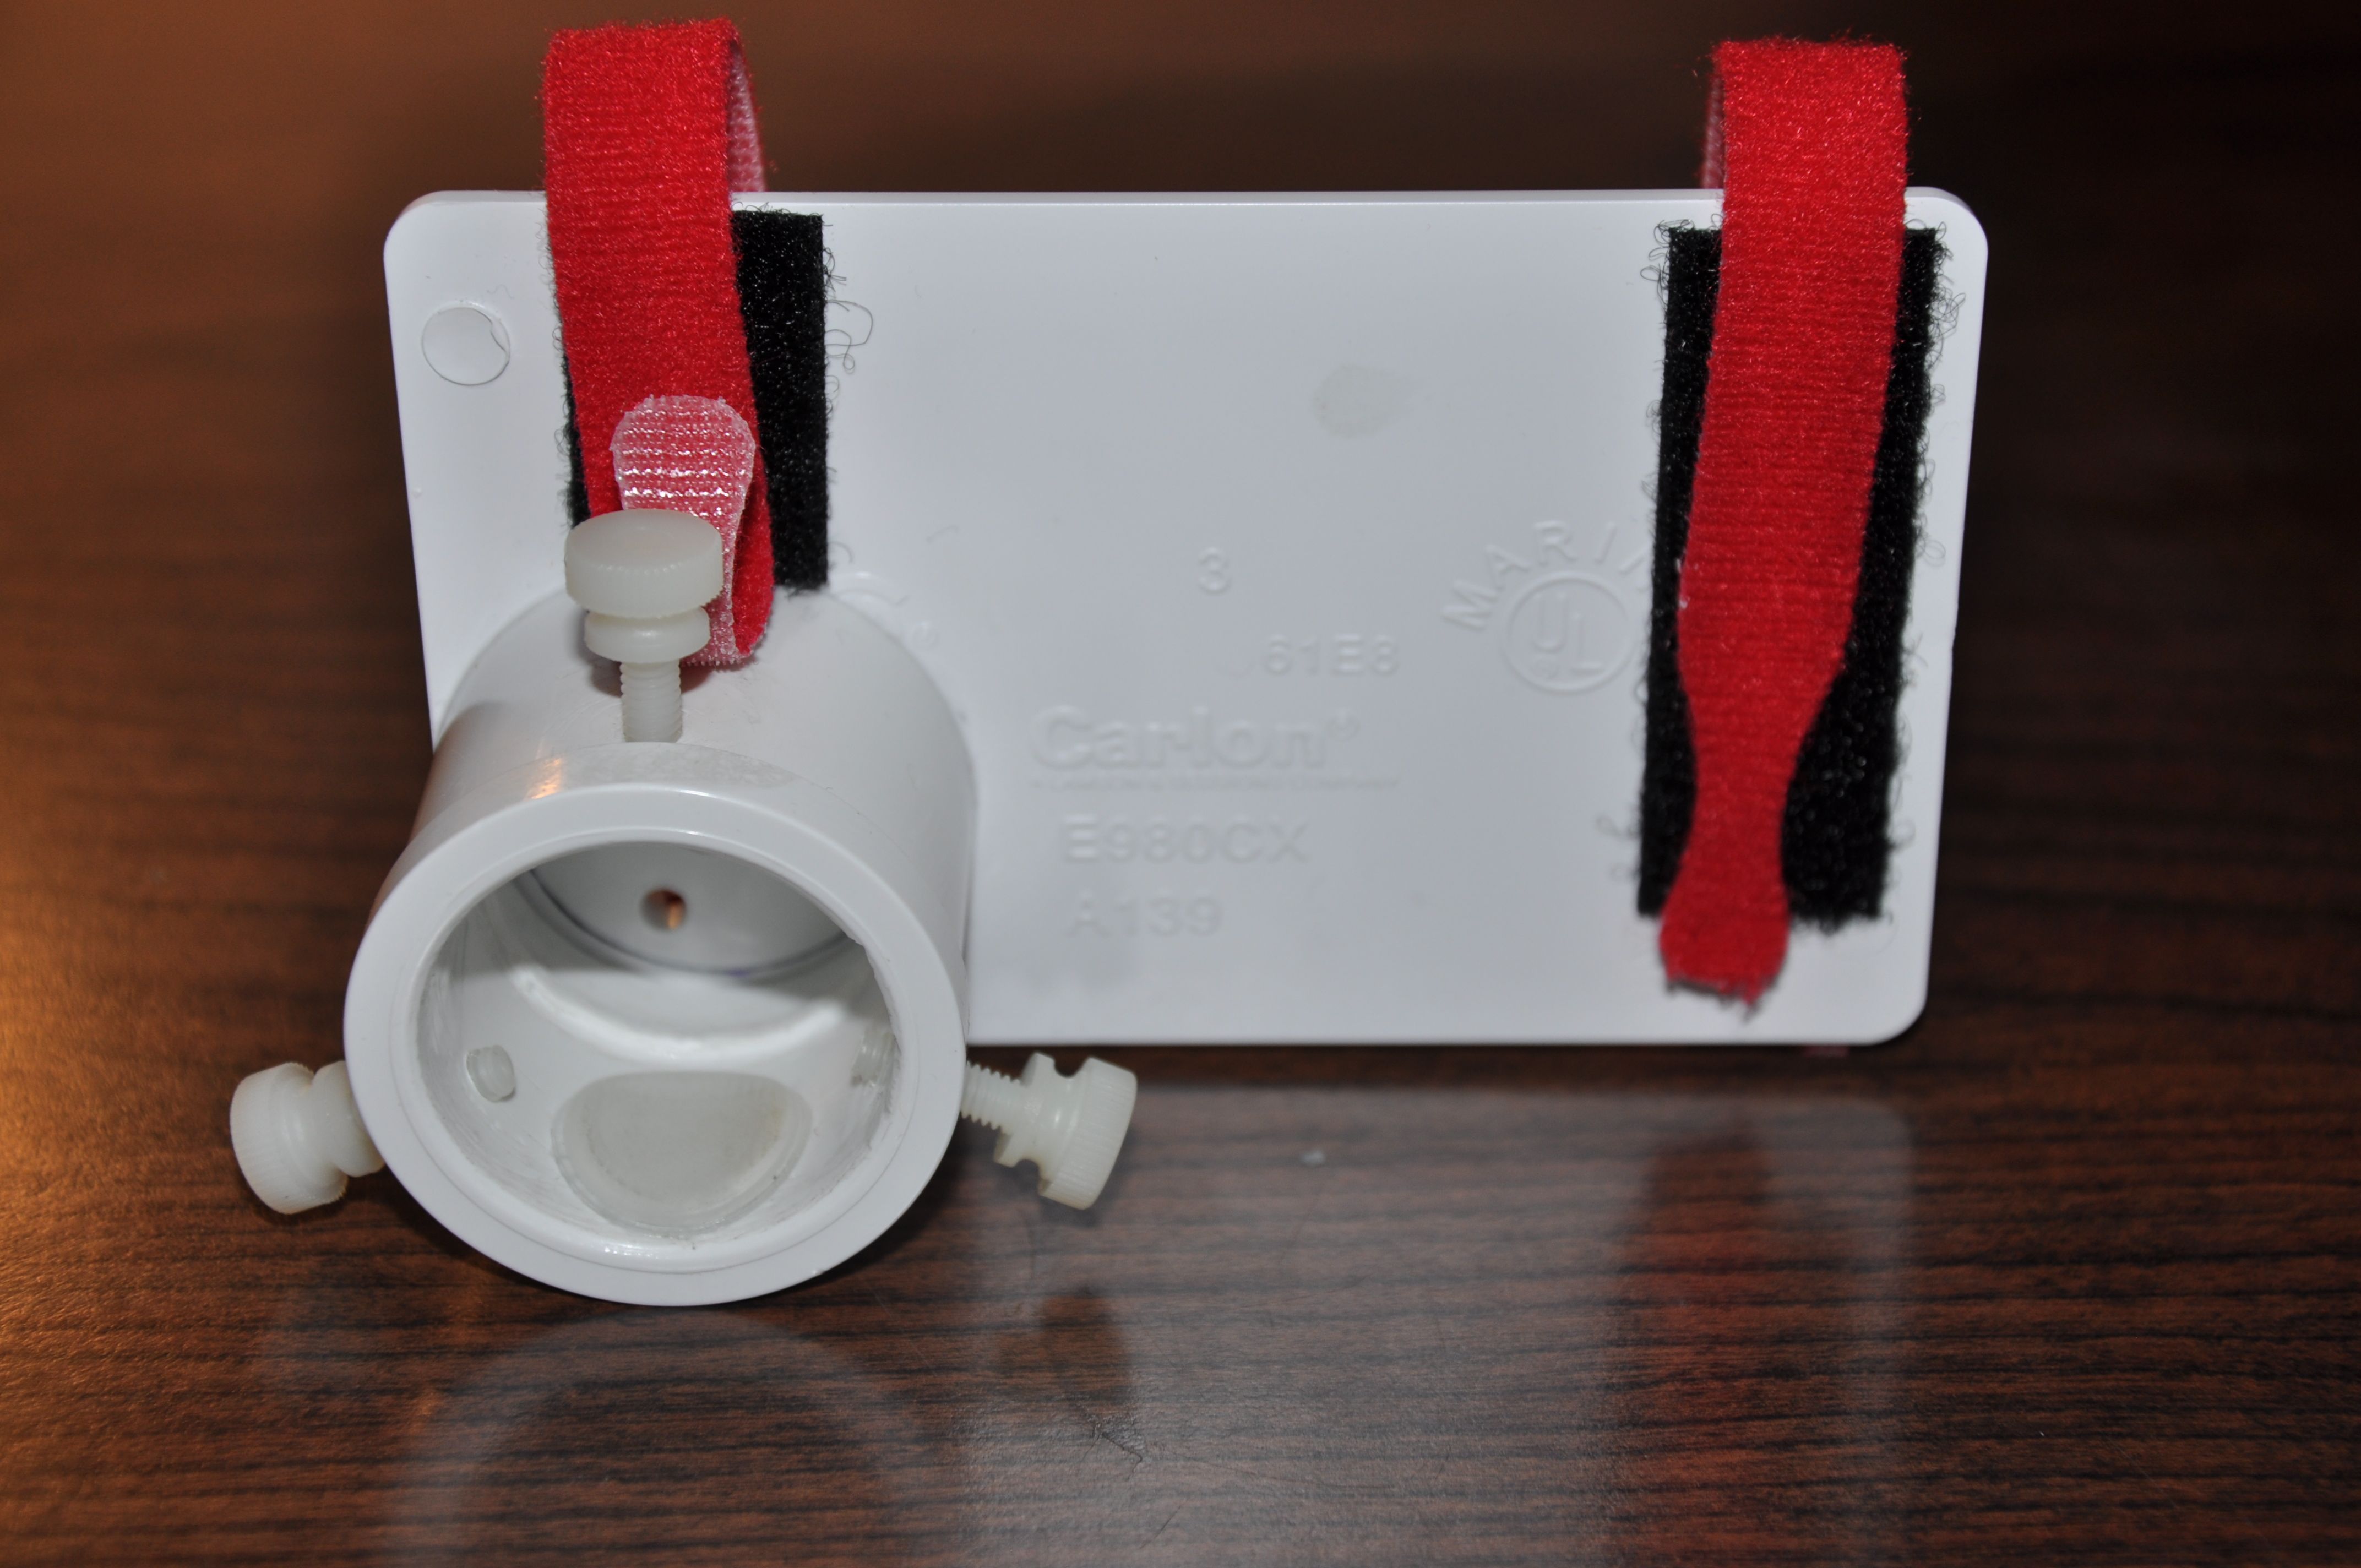
Back side of receptacle cover with 1/2 inch cable staples super glued in place. The view hole must allow the iPhone's camera lens to be
perfectly centered over the eyepiece. I'd recommend making a template of the back side of the iPhone and locating the lens and
then transcribing that to the receptacle. Click on each image for higher resolution.
The adaptor below was made to attach to a Celestron 94224 Polar Finderscope
Drill 3 holes that are equally spaced. Use a tap to make the threads for the thumb screws.
I used an 8-32 tap and threaded nylon thumb screws.
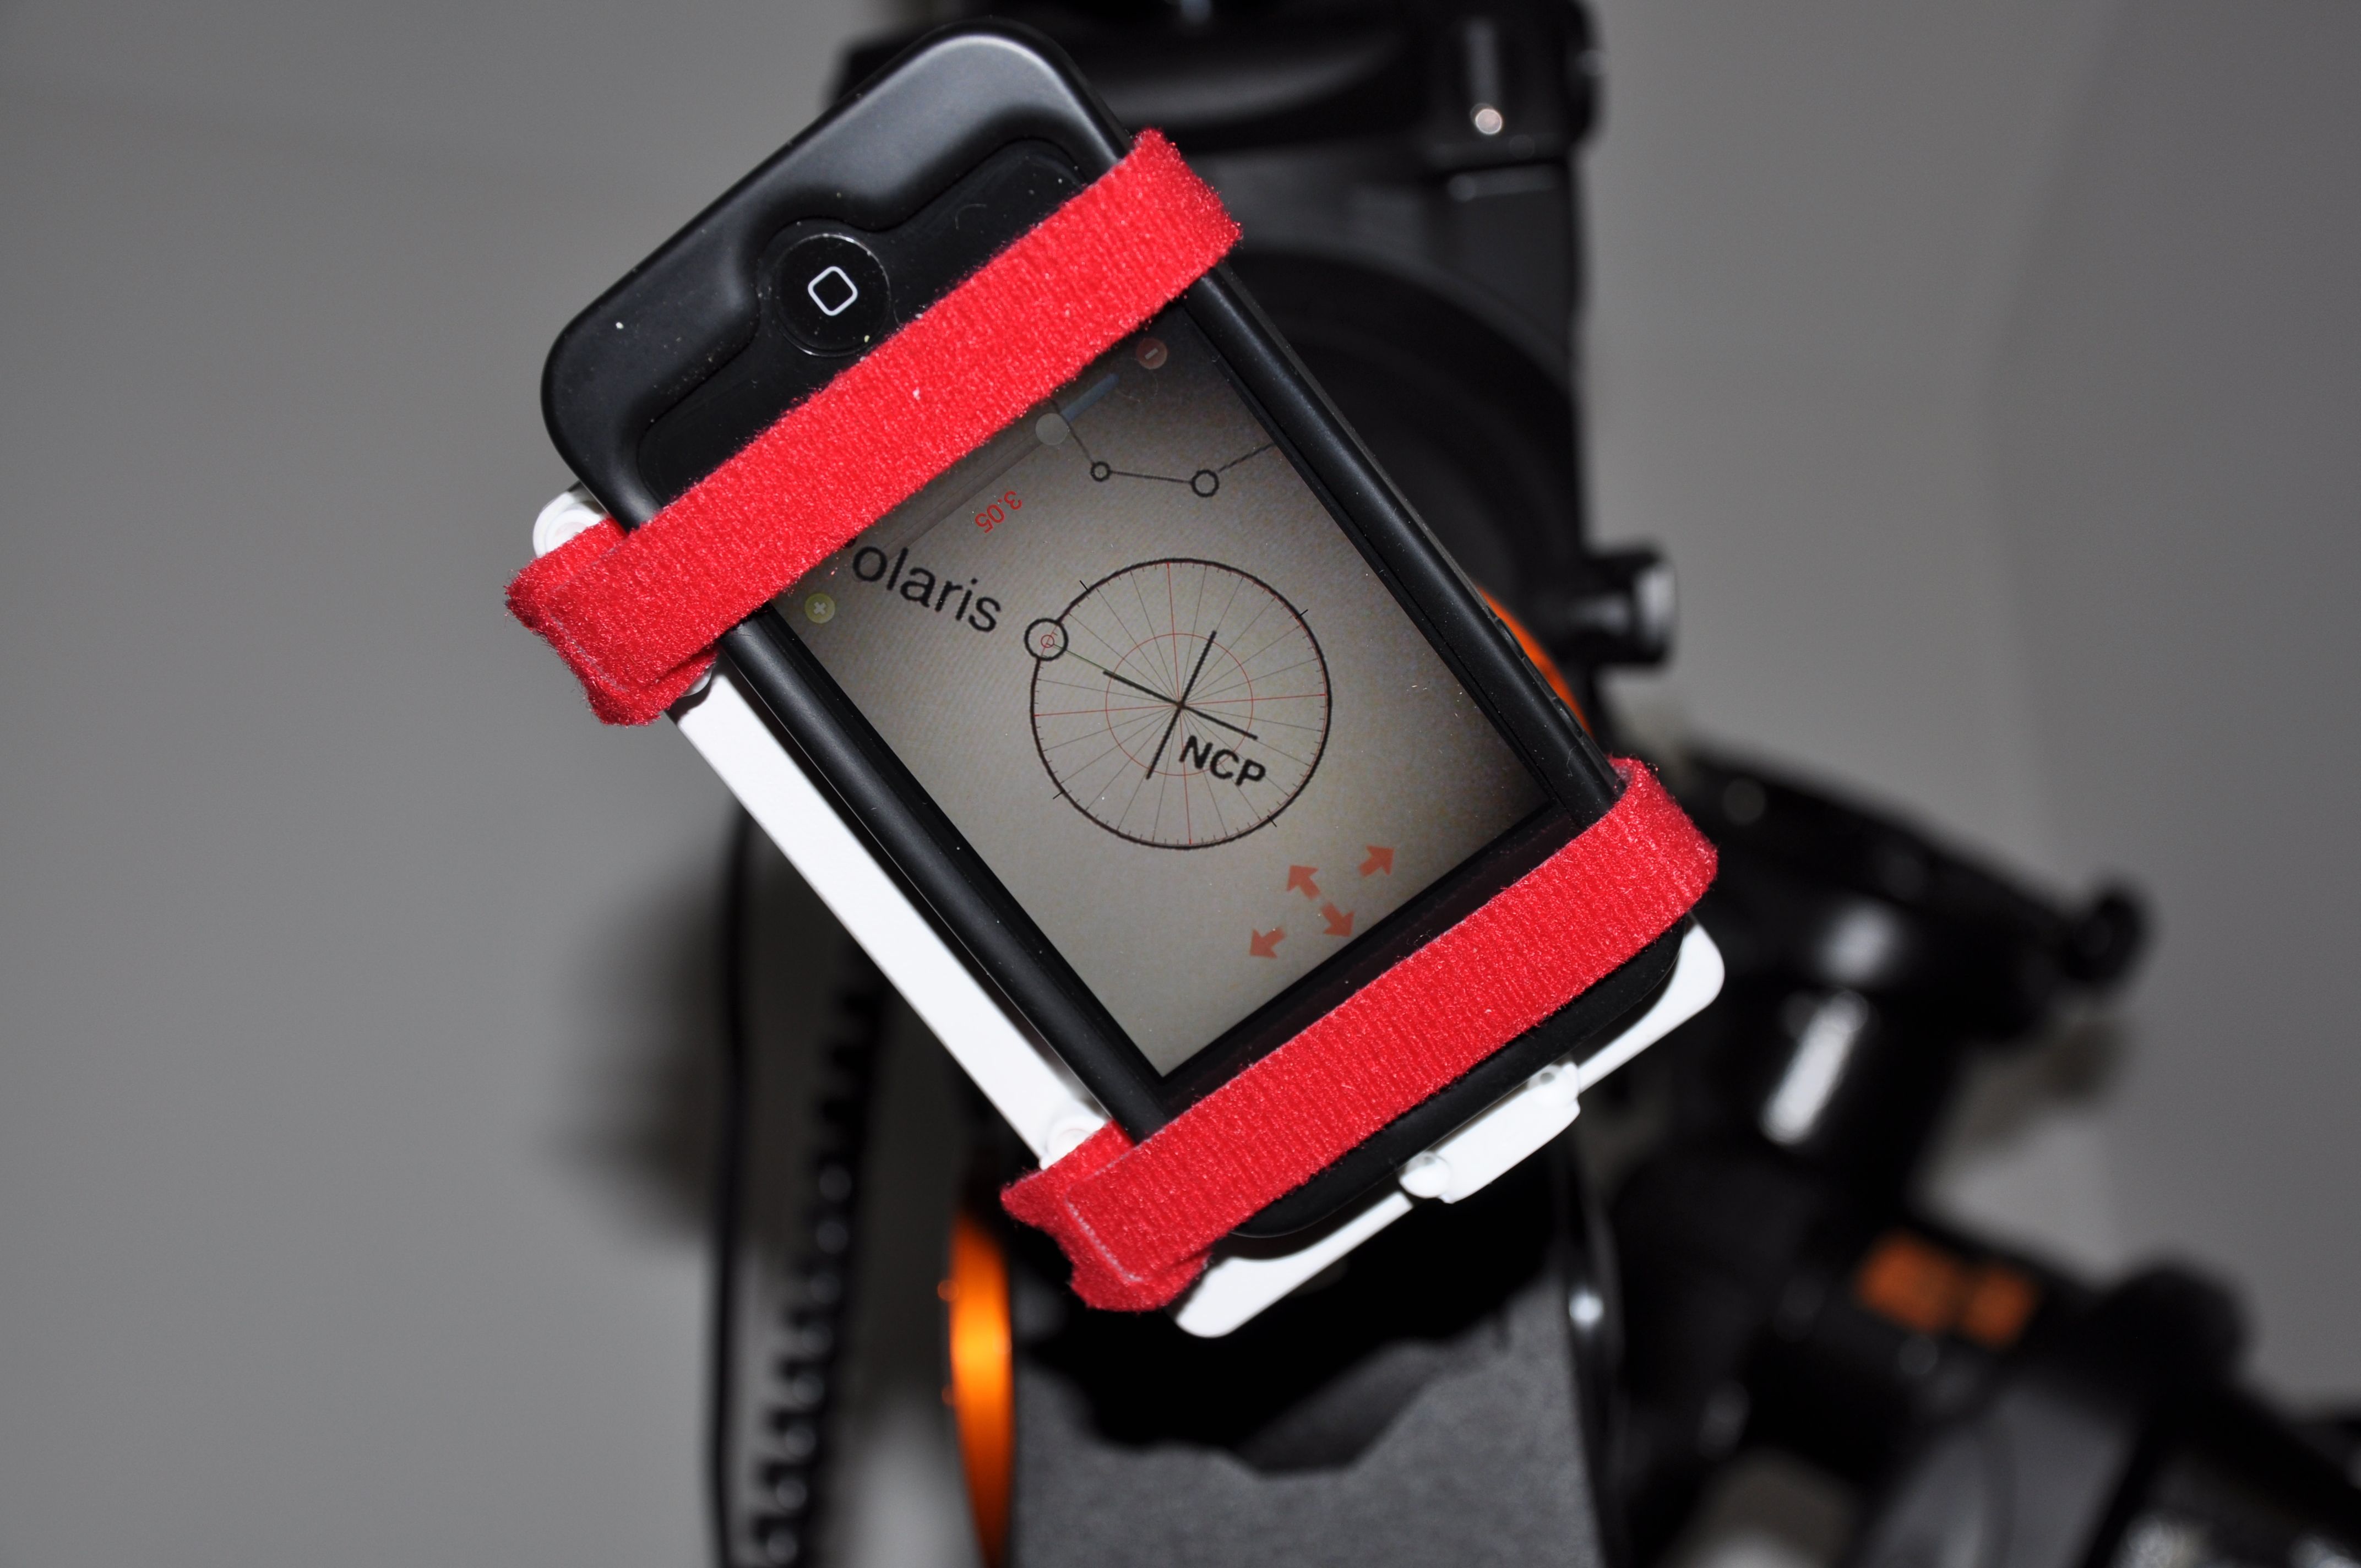
Picture of the adaptor attached to the back side of a Celestron CGEM mount. The camera is zoomed so the polar finder scope's reticle matches
PolarAlign's reticle in size and alignment.
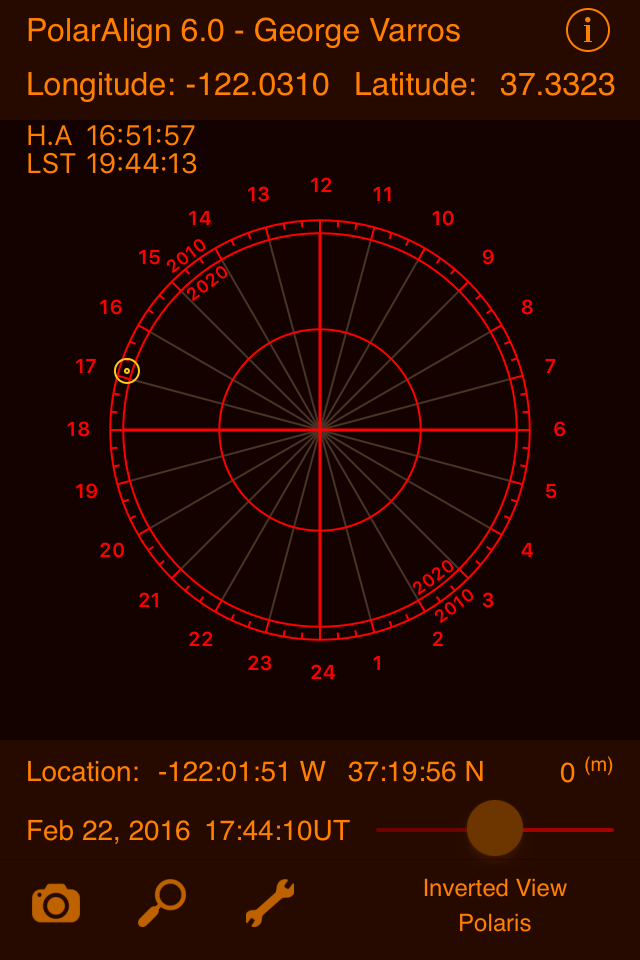
Screen capture of Polaris (PolarAlign 2.1).
Note: the iPhone screen capture diminishes brightness of Polaris which is more aparent visually
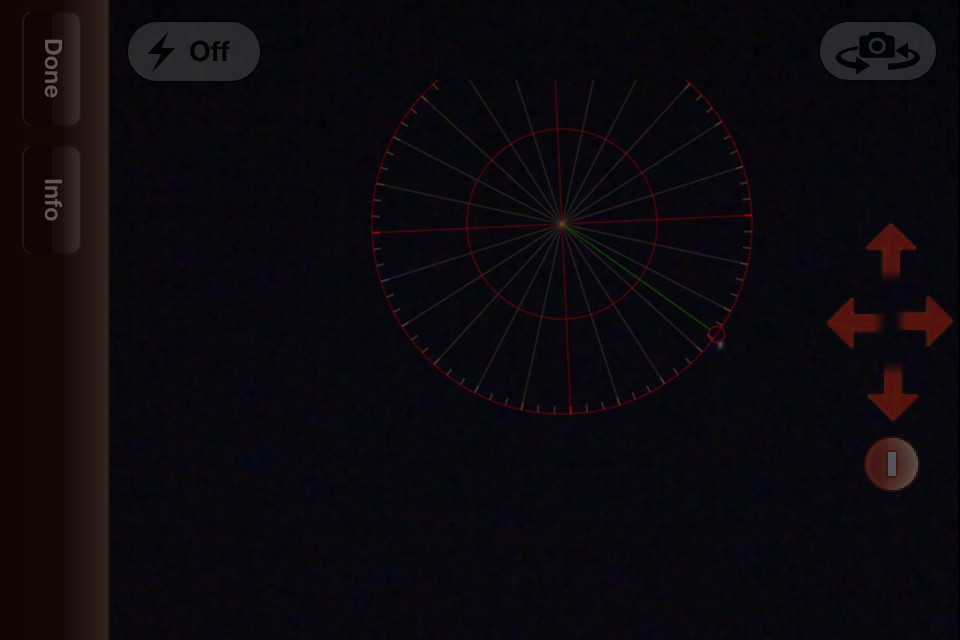
Perfectly aligned on Polaris.

For additional information, please e-mail me at: georgevarros at att.net